Posts

Showing posts from October, 2010

Just Like That, I am Back
Image
 If I said I was back, would you believe me? Blogging is complicated, and there are so many "get rich quick" blogging schemes that make it look like you are a lost cause if you are not currently earning money blogging. And why are you even blogging if you don't have multiple streams of income and entertainment. If you don't have a brand? I do have this website, but I do not have Instagram, Twitter, TikTok (you don't want to see me dance), or whatever is next.  Heck, I haven't even updated this since before the pandemic. So why am I here, writing about being back and then, probably ghosting for another two years? Life has been rough. It's been painful and overwhelming. I am so thankful for you my readers, or what is left of you. I am so thankful you are reading this post. I am so thankful that you are still committed to making the world a more exciting and more sustainable place.  Keep up-cycling my friends, and you never know, I might be back again with an

One Week To Etsy: Take A Picture Day Three

Image
I am back and we will be talking about taking pictures for your ETSY Shop. First and most important you want to make sure that you have a solid background to take the picture against. My Background a Simple $2.00 Trifold You also want to have lighting. Natural is best, but if you are like me you probably only have a chance to take pictures at night so I use this light. The Ottlite and yes that is my clutter The other thing you will want to use is a good editing program. I personally use Picnik (Kimberly from Bugaboo, Mini, Mr., and Me turned me on to it) It takes pictures like this.... And with a little tweaking it turns it into this... Monkey Ear Dress So much better don't you think? I also like to take pictures of the details of the clothes. This dress is serged so I needed a picture of the serging. Serged Seams If you have a similar outfit that your child wears it would be awesome to include that.  People love to see the outfit in action. So

Sick Day

Image
Well One Week to ETSY is going to take a little longer thanks to two sick kids and a sick husband. I am on blogging hiatus until the wee ones, and the big guy, get better. Fingers crossed I don't join the germy mess that is my family. Until next time enjoy this random picture of my dog. Big Phugs the Pug

Upcycled Awesome #19

Image
It's time for Upcycled Awesome, your green linky party dedicated to upcycled crafts and more.  As always you have until Saturday at Midnight to post your upcycled project.  Upcycling is taking something you already have, something rescued from a thrift store, garage sale, or even your neighbors garbage and making it into something new. For more information on upcycling check out this post . We all need a place to go to find green projects on the web so why not link yours up here and then check out other green crafty bloggers. I know I get some amazing ideas from this linky party. Pretty much anything goes. You can sew, Mod Podge, or redo furniture, as long as it is something that is redone in some way or another. Please do not link up projects made from 100% new materials. I love these products, but they really don't constitute upcycling. Other than that here are the rest of the easy rules: Decide what upcycled project you want to link up (more than one is fine by me!) Link b

How To Set Up An ETSY Shop: Day Two Selling

Image
I am a slacker. Yes a total and complete slacker.  I have been to this point in setting up an ETSY shop for about five months and just never bothered to go upstairs and get my credit card to submit the information. You see today we are going to register as a seller and agree to pay the fees that ETSY has laid out. The fees are as follows: Get started! Sign up for free . To start selling on Etsy, you’ll first need to register for an Etsy account . To become a seller, you’ll need a credit card for verification purposes. List your items . It costs 20 cents to list an item for four months. When your item sells, you’ll pay a 3.5% transaction fee. Read all about Etsy's fees for more information. Etsy makes it easy to pay your bill each month with a single click.

How To Set Up An ETSY Shop: Day One The Name

Image
It took me about three months before I came up with a name that I liked for my blog. there were a lot of different choices, but most of my ideas already had the .com URL taken. When I decided on The T-Shirt Diaries because I love upcycling t-shirts and found the URL was available  I grabbed it and voila here I am. Here is the thing, although I do intend to sell a ton of T-shirt dresses I didn't think The T-Shirt Diaries was the right name for my ETSY shop. I knew I needed something that was easy to remember and easy to spell.  I also needed to find a name that was available on ETSY.  I have always loved the name "Punk Rock Babies." Apparently so did someone else. I like the idea of babies being a little punky and funky so I figured I would stick with that theme. Allow me to introduce you to: PunkRockBaby. It was available, it was cute, and now it is the name of my ETSY shop. (Please note that the name that you register your ETSY with does not have to be the name of

How To Set Up An ETSY Shop: One Week To ETSY

Image
So for the past year I have been telling myself that I am going to set up an ETSY shop. Has it happened? Well no. So I am going to set it up in public. Yes in public. Join me this week as I go through how I got my EBAY shop up and running. Will I succeed? Will I fail. Is this just me publicly humiliating myself? I guess we will all soon find out won't we. Wish me luck and join along if you dare! Warmly,

Vermiculture Harvest Tutorial

Image
I love worms! They can eat their body weight in food scraps in a little more than a day. What a great way to make compost and surprise the neighbors with you rather interesting little pets. Vermiculture is composting with worms and let me tell you the things vermiculture does to my tomato plants is better than any fertilizer you can by. I live in Cleveland Ohio (not known for gardening weather) and I have eight foot high tomato plants. can you say that? Since gardening season has ended for me and the frost is pretty much here I had to harvest my little wormies to collect the fertilizer and bring them inside. What you will need: Gloves Worms to harvest New worm bin with bedding to put the big guys in Compost (worms love coffee grounds, banana peels, finally cut up fruits and vegetables (no citrus) About a pound of dirt or fresh worm compost Honestly this bin had been outside since it got warm in Cleveland (May I think?) and it looks a little rough. I actually harvest

Upcycled Awesome #18

Image
It's time for Upcycled Awesome, your green linky party dedicated to upcycled crafts and more.  As always you have until Saturday at Midnight to post your upcycled project.  Upcycling is taking something you already have, something rescued from a thrift store, garage sale, or even your neighbors garbage and making it into something new. For more information on upcycling check out this post . We all need a place to go to find green projects on the web so why not link yours up here and then check out other green crafty bloggers. I know I get some amazing ideas from this linky party. Pretty much anything goes. You can sew, Mod Podge, or redo furniture, as long as it is something that is redone in some way or another. Please do not link up projects made from 100% new materials. I love these products, but they really don't constitute upcycling. Other than that here are the rest of the easy rules: Decide what upcycled project you want to link up (more than one is fine by me!) Link b

Upcycled Crayon Tutorial

Image
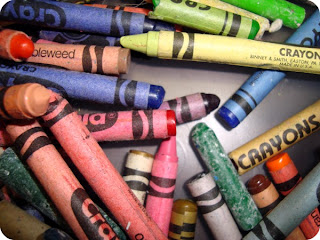
I recently purchased two bags full of partially used crayons from a garage sale. The total cost $1.00. Score. Here is the thing, I love crayons but I wanted to make them a little more than what they were. I did not come up with this idea. I have actually seen quite a few people upcycling crayons lately. I guess the big difference between my crayons and some of the others is that I went with combined colors not just solid colored crayons. I also only used crayons that have already had a lot of "fun" already (aka used crayons). So here we go. I started with a bunch of silicone ice cube trays I bought from IKEA. I peeled the papers off of the crayons, broke them, and put a few like-minded colors together. I also sprinkled a little glitter in the ice cube trays for some fun. I pre-heated my oven to 275 and placed the crayons in the oven for twenty minutes until they were melted. The time will vary based on how many crayons you are melting. Allow the crayons to cool

Upcycled Vintage Button to Hair Accessory (Pin, Clip, Whatever You Want To Call It)

Image
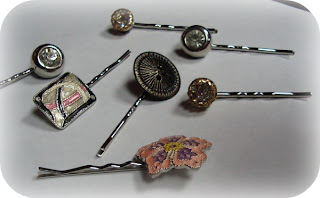
As promised here is a super quick tutorial that will show you how to make a  vintage button (or new button) into a to die for h air accessory.  You will need: Buttons Hot Glue Wire cutters Bobby pins Select Your Button. I got this one from a garage sale and I LOVE it!  I use Bobby Pins. These are available at most craft stores. Snag some next time you are out! Bobby pins and buttons might work if you have a flat little button, but most cool buttons have a little thread loop thing (not the technical term). This will need to be removed .   Don't worry no buttons were hurt in the clipping of this button.    It only looks painful. I am a hot mess when it comes to glue guns so I have this glue stick melter that works so much better for me. Smoosh the button on the hot glue (be careful not to burn yourself). Voila! Don't you love finding new uses for old thing? I know I do! Now go Crazy and crank out a bunch of Upcycled Button Hair Clips!

Crafts I Have Made

Image
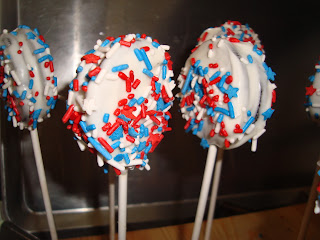
It has been so crazy I barely have had a chance to post all of the tutorials I have been working on or anything I have actually crafted myself lately. Here is a look at the crafting life of Robin: Oreo Pops T-Shirt Dress Another T-Shirt Dress Upcycled Crayons - Tutorial coming soon Upcycled Button Hairclips - Tutorial Coming Soon Vermiculture Harvest - Tutorial Coming Soon What have all of you been up to?